Tuesday, December 9, 2014

Small Framed Art

Frame my cards?  I hear people say they are purchasing my cards to frame and I always wonder how they turn out. Well, I tried it myself and wanted to share my results with you.

First of all I was inspired by the frames at Master Framers in St. Paul. They hosted an art event at their shop last weekend and I was one of five artisans displaying my cards and prints. While there, I looked thru their sale bin of small ready made frames and picked out a few to buy.
There was a nice variety of woods and metals to chose from.  My favorite frame deal came with a silk-like mat in it with a gray metal frame.  It worked perfectly with the colors in my thistle card.  I trimmed off the card and mounted it directly on top of the mat. Make sure you leave enough space around the card when you choose a frame.

I'll bring it along to my next art event to show how nice my cards looked framed.


Wednesday, October 29, 2014

Personalized Baby Blankets


Cash James loves his new blanket. I designed the fabric for Modern Yardage so that it can be customized for any child's name. Of course, I wanted to create one for my great nephew Cash in the turquoise and a coral colored version for his cousin, my great niece Madelyn Rose.
Melissa at The Linden Tree helped me select the soft, fuzzy Cuddle fabric for the back of the blanket and sew it together in her shop. I am so grateful to have her help to bring these fun sewing projects to life.   They offer sewing classes to help you sew, too.

Do you know a child who would love a blanket with their name on it?  All you do is submit the name with your order at Modern Yardage and it will be placed in the blanket pattern. It is available in two different print scales, too. The scale shown here is large.
To order the turquoise fabric click here
To order the coral colored fabric click here.


Friday, October 24, 2014

Great River Road Wrap Up


This is the best looking catfish I've ever seen along the Mississippi. It's home is at Abode Gallery in Stockholm, Wisconsin. They are more than a gallery and to appreciate what they do, check out their website here.  I eagerly dropped off my card catalog with them and am excited to say they have ordered my cards! I am grateful to be in such a wonderful venue.  Here's a few more pics of the gallery.  I did not get to spend enough time in Stockholm and need to go back.


The General Store next to Abode was stocked with great Wisconsin made foods and  gift item. Love the sign.
Onward south to Pepin and the Villa Bellezza Winery. More info here. It's right on why 35 so you can't miss this Italian architecture stunner.  I went into the wine tasting room and sampled 3 different wines expertly described by the hostess. There was an event going on so the other buildings weren't open to explore, but it was a beautiful day to enjoy viewing the vineyard.  


I stopped for lunch at Nelson Cheese Factory and found that delightful as well. It's also right on the Great River Road, highway 35, so you can't miss it. Info here.  It's a market, lunch place, wine room, ice cream shop and has indoor and outdoor seating. It was sunny and near 70 so outside dining was perfect. Again, you must stop here! The food and atmosphere are terrific.


It was after 2:00 when I left and I still had a couple more stops to make. I crossed back over the Mississippi River to get to Winona, Minnesota to stop at the Minnesota Marine Art Museum, recommended by my good friend, Marlene. It is located right along the Mississippi in a beautiful building and held marine art collections. The Hudson River School paintings were spectacular. I'd only read about them in Art History classes. I also got to view the new Ansel Adams Exhibit with his stunning black and white photography.  More info here.

Winona was beautiful with its rolling hills of color. I continued traveling south to Prairie Du Chien, Wisconsin and cut over to the Iowa side at McGregor and down towards Guttenberg where I ran out of daylight before making it to my parent's home. Nature really put on a show this Fall and I'm glad I got to witness it and visit some great towns and shops along the way.  

Plan your own Great River Road trip here.

Thursday, October 23, 2014

Visit to Cultural Cloth

Wow! What a pleasant surprise stop this was. While on my trip down the Great River Road, I stopped at the Cultural Cloth store in Maiden Rock, Wisconsin. Founder Mary Anne Wise purchases textiles, accessories, rugs and woven goods from women in developing countries to economically empower them.  I love that idea and I love the array of pattern, color and texture on the goods the artists create.

Cultural Cloth located right on 35 so you can't miss it!

I really liked seeing photos of the women artists.

Please stop by to visit this shop and keep in touch with them thru their Facebook page. I am so glad I stopped in to see this shop and learn about the wonderful work they do. I bought the loveliest scarf while there to remind me of this special place. Mary let me take pictures of various patterns and textures in the shop to share with you. Enjoy!


Monday, October 20, 2014

Friends of Freedom Park


What a beautiful Fall day to enjoy the color and start of the Great River Road running from Prescott, Wisconsin along the Mississippi River!  The gift shop has been buying my cards for a few years and I always wanted to stop in to visit. 

My cards greeted me just inside the gift shop door. The Gift Shop Manager was away on business, but  I met Jessica Bierbrauer, the Executive Director, who shared additional materials about the Great River Road. The building serves as an educational facility with hands on exhibits, and has panoramic views of the Mississippi River. I wish I had more time to check out all it had to offer but I had a long road ahead of me that day.

I LOVE this rock machine that dispenses gems instead of bubble gum!

There is a sculpture created out of trash collected from the Mississippi River. This reminds us all of our responsibility to be conscious environmental stewards of our natural resources.  

For more information on the Great River Road Visitor & Learning Center, click here.  


Thursday, September 18, 2014

Sewing Up a 'Convenience Quilt'

I'm not a fan of the term 'cheater quilt'. It makes what I designed for Modern Yardage sound cheap and second rate. I know full well the difference between a pieced quilt and mine, the hours and dedication it takes, but I do think the pre-printed designed fabric panel deserves a better term. So I'm going to refer to it as a 'convenience quilt'. To emphasize my point, 13 year old Lindsey is going to make the baby quilt in 5 hours while her Mom, Melissa/owner at The Linden Tree, guides her and I photograph the steps. Here goes:

My Amelia Harper panel is available at Modern Yardage. It is 36"x 54" and costs $17. Lindsey first trimmed off the excess fabric and then measured 66" of dark blue fabric for the back.
She trimmed the back panel to 40"x58" and saved the remaining fabric for the binding.  Melissa suggested a batting that would accommodate stitching 7.5" apart- the distance between the fabric squares- and Lindsey trimmed it to 40"x58" as well.
The next step required spraying a temporary adhesive on the wrong side of the quilt back, smoothing down the batting on top of it.  Here Lindsey is spraying just half of the panel at a time in a well ventilated area.

After spraying the batting, she laid down the top panel and smoothed it out, finishing her quilt 'sandwich'.

Then came the fun part of topstitching the front panel. Lindsey 'stitched in the ditch', carefully sewing along all the pattern pieces.

It looked amazing! The whole process up to this point took about 3 hours.

 Next Lindsey trimmed out the binding strips to 2.5" wide, cut the ends at a 45 degree angle and stitched them together. I apologize the fabric looks a different color blue but it isn't.
 She folded the binding strip in half and pinned the raw edges together on the back side panel, leaving the first 5" free of stitches to connect the final strip at the very end.


It was difficult to photograph how she sewed the corners since the thread is the same color as the fabric. Lindsey stitched to about 1/4" from the end and stitched at a 45 degree angle to the corner. She folded the fabric to create a flap and folded again to continue sewing.


 When Lindsey reached the end of the binding, she marked a 45 degree line meeting the beginning strip.


She unfolded the binding, pinned them together and stitched across.
Here's where the bind came together, was folded in half and stitched along the raw edges to finish the bind.
Melissa was close by to guide Lindsey thru the final binding stitches.

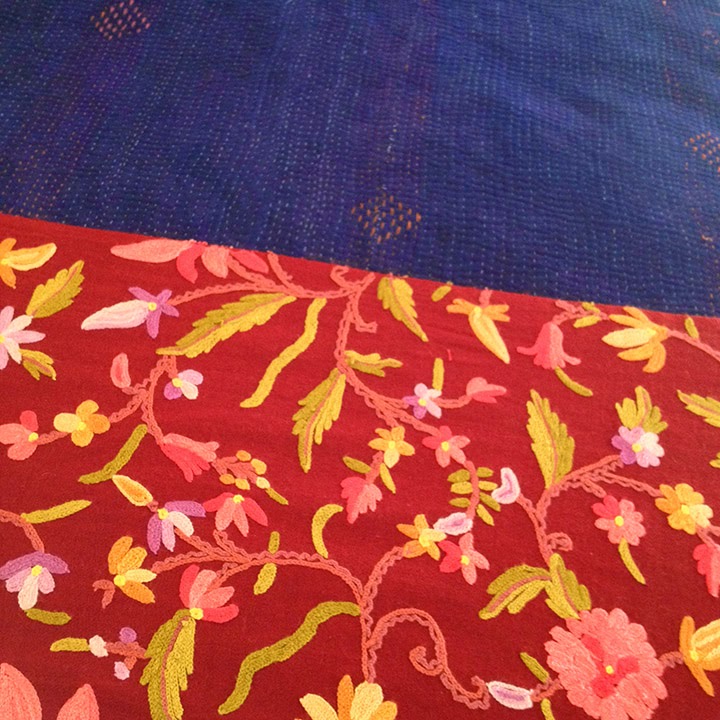
Here's a close up of the top side of the quilt where the binding folded at the corner. Lindsey did an excellent job stitching close to the edge nearest the design to give the quilt a finished look. 
Voila! A beautiful 'convenience' quilt done in about 5 hours. Jackson gives his pose of approval.  I'm so grateful to Lindsey and Melissa for showing how my fabric panel can be made into a beautiful baby quilt!